Deterioration of print quality or marks on prints may be due the Laser Glass needing a quick and easy clean.
Cleaning the laser glass removes any debris or toner that has fallen onto the glass during operation that could be blocking the drum units. A drum unit is an electrically charged cylinder that transfers the powder onto paper and is not to be confused with the toner cartridges. It is advised that cleaning is done on the laser glass once in a while to ensure the consistency of the quality of your prints.
E8 Models
In order to give the laser glass a good clean, please follow the instructions below to perform a simple clean on the laser glass:
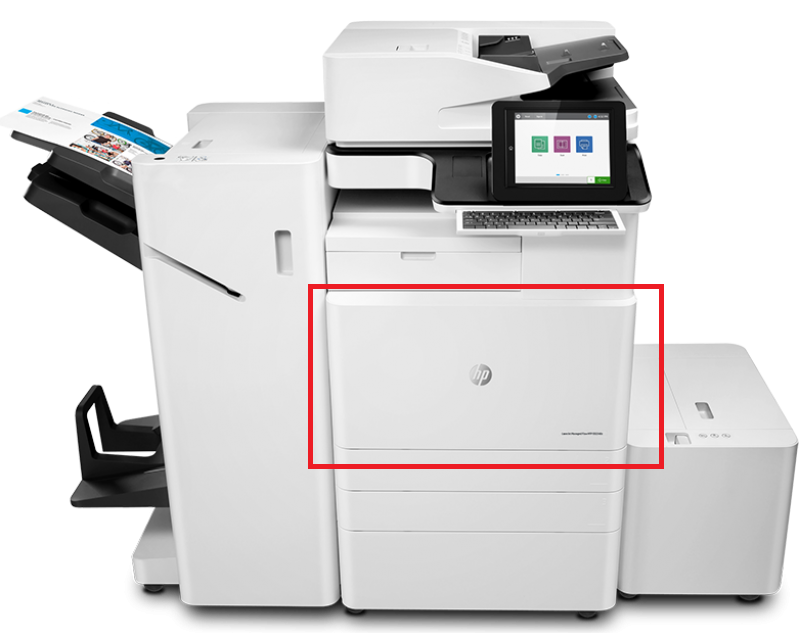
1. Please locate the panel that you open to install toner cartridges.

2. Open up the panel and on the panel itself, there is a brush that is used for cleaning as shown in the picture attached.
.png)
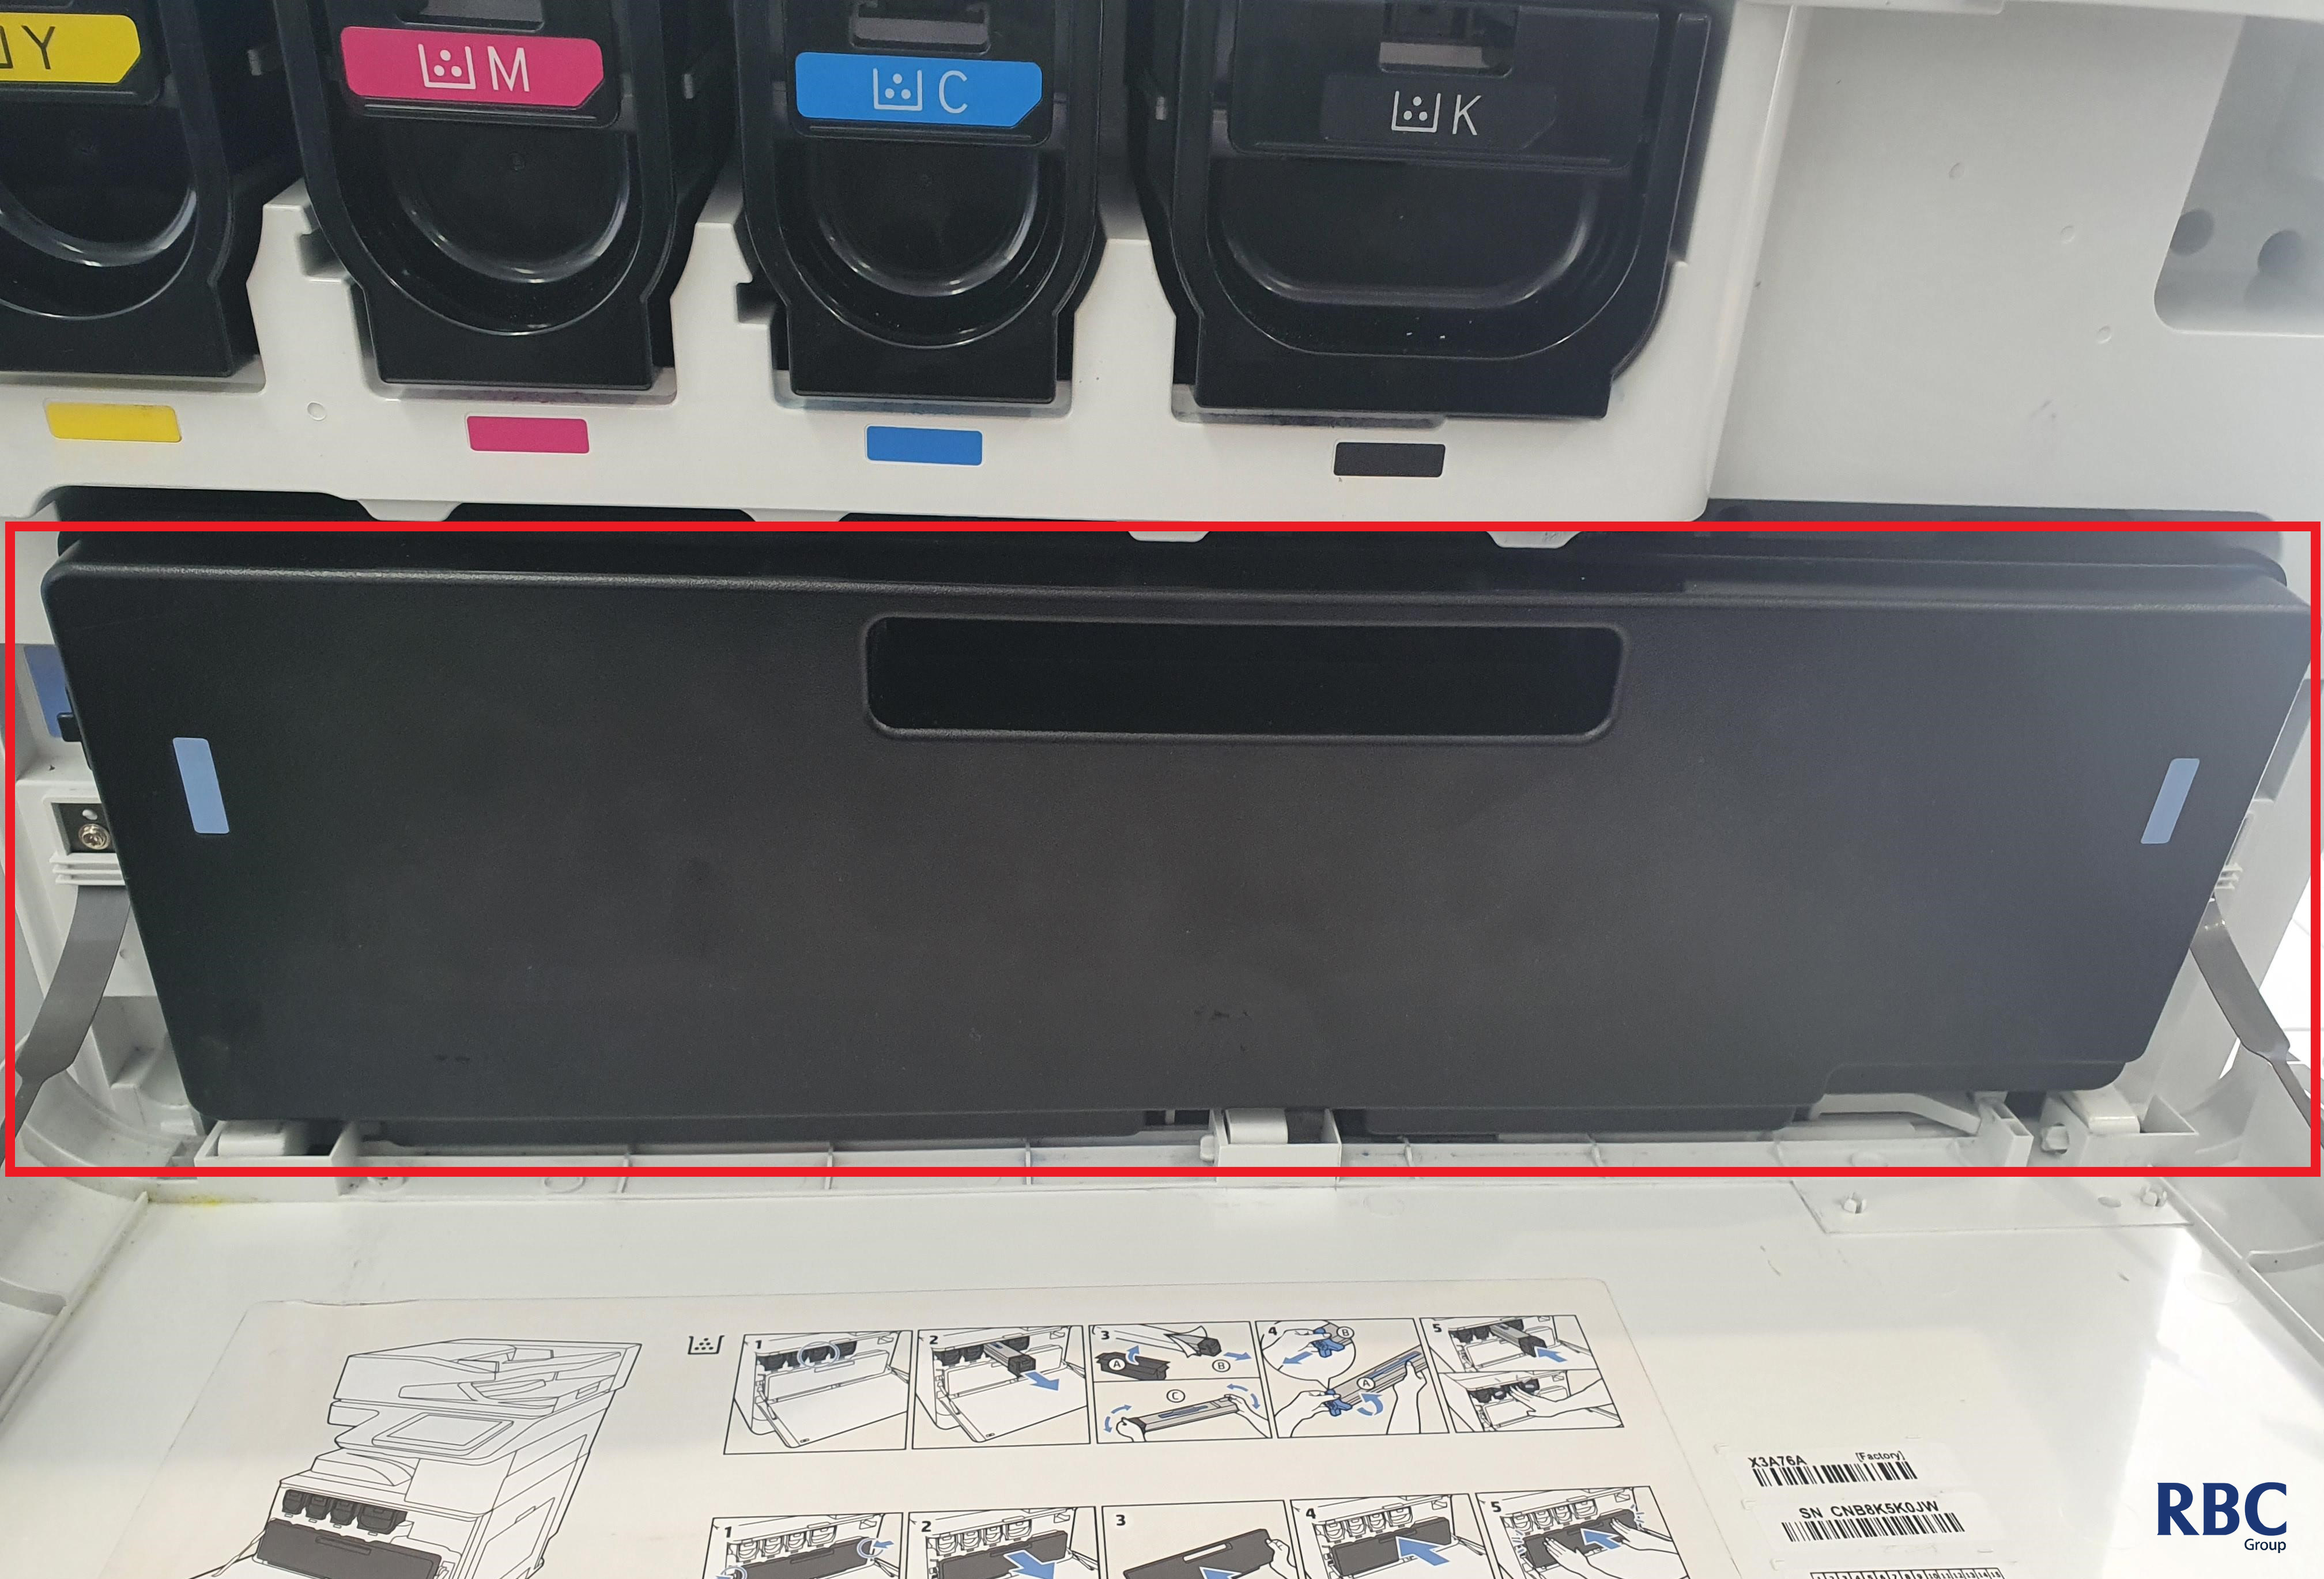
3. After locating the brush, please locate the drum unit that are under the toner cartridges that are covered with the waste toner container as shown in the picture below. Please remove this panel by undoing the clips located on both sides of the panel.

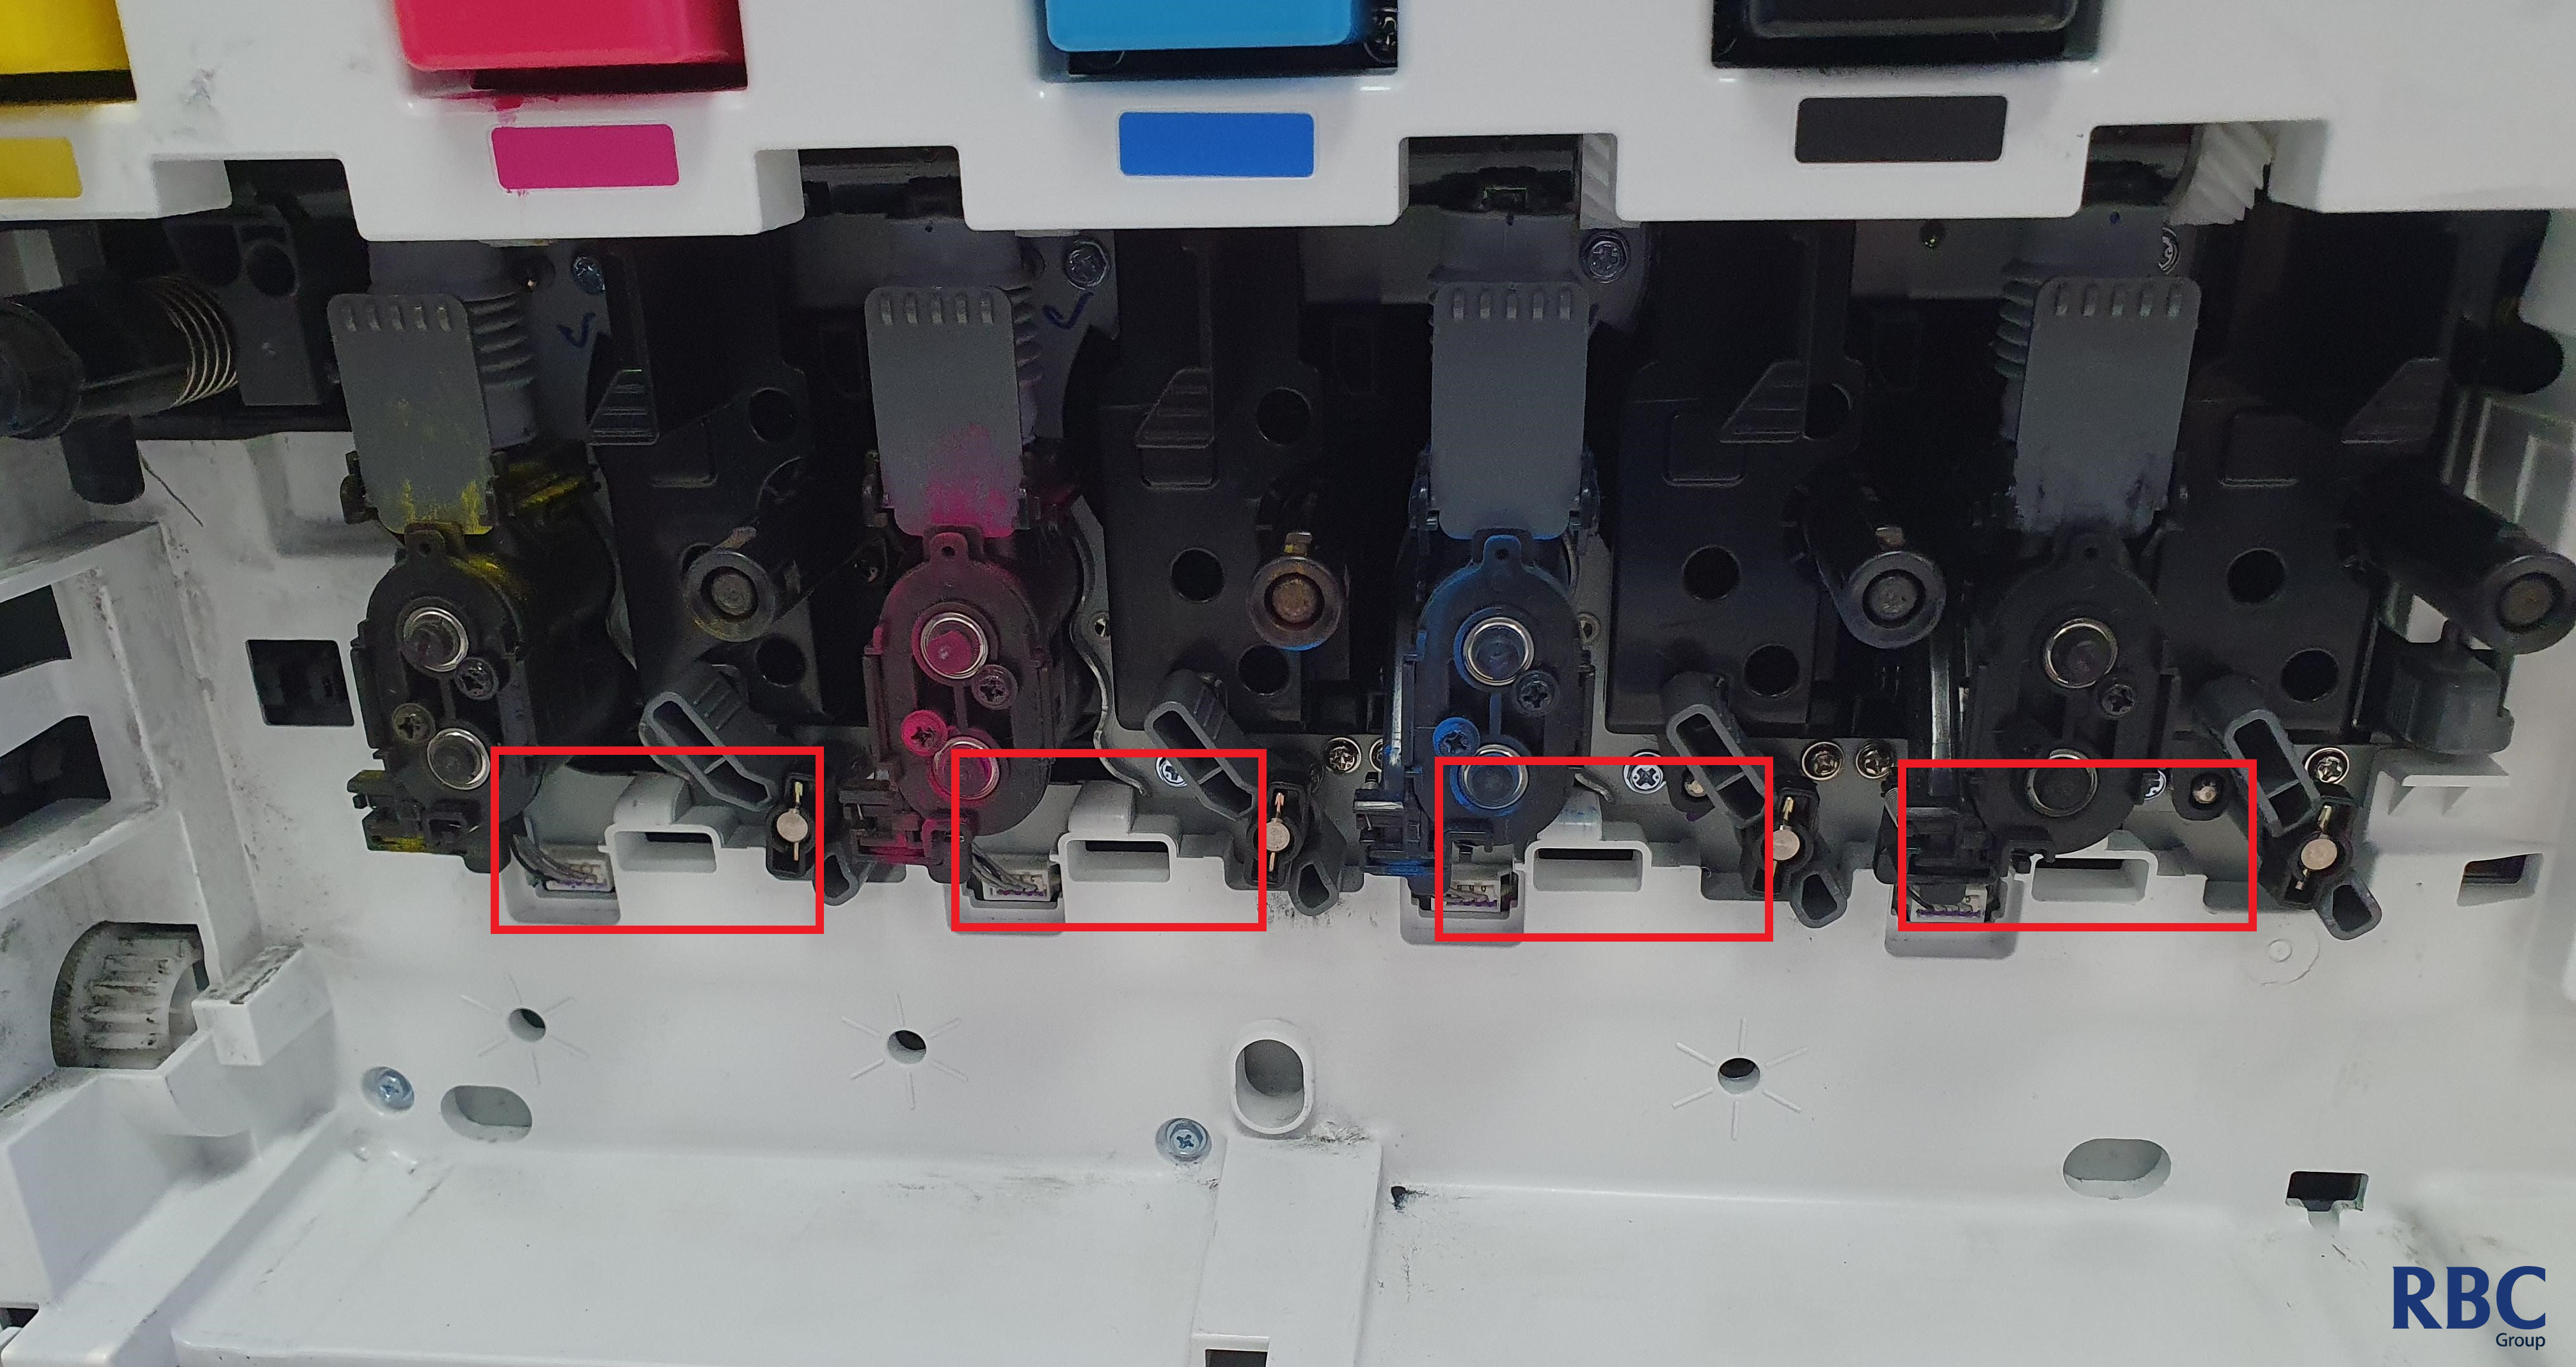
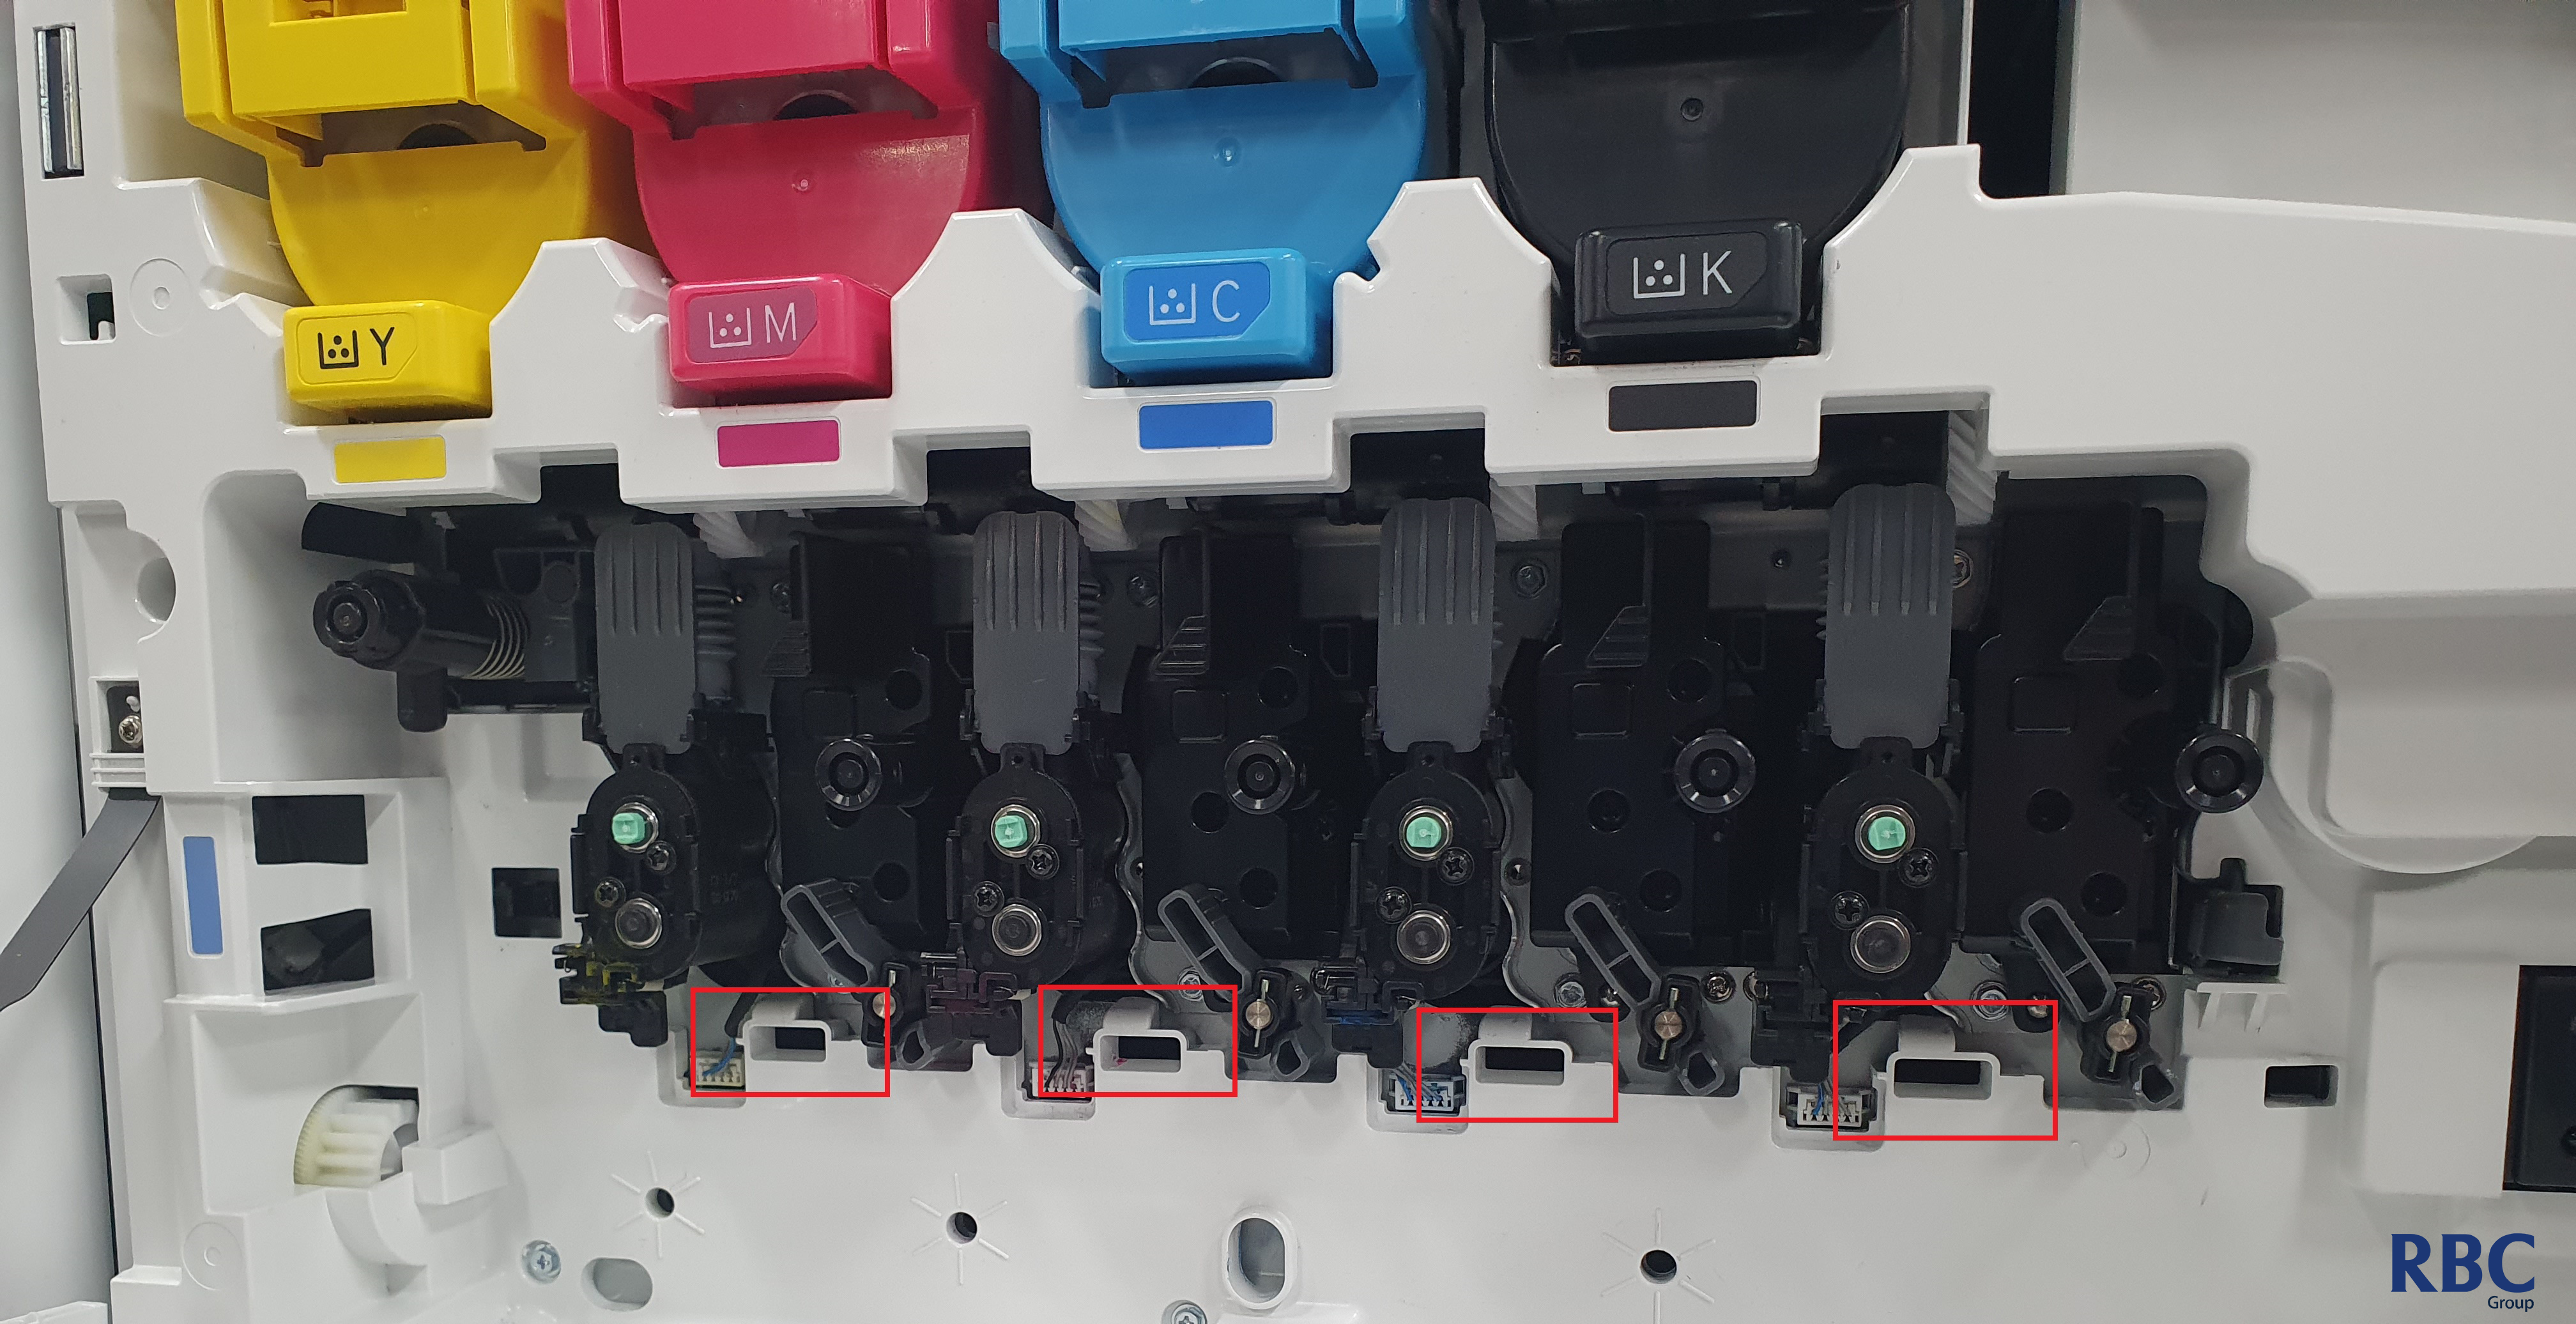
4. The red rectangles are showing where the brush will fit into.

5. Please insert the brush into these slots to clean the laser glass and repeat the process at least 4-5 times.
6. After doing this clean, print a test colour print and compare the print quality.
The best way to do this without needing to send a print to the printer is printing out some Print Quality Troubleshooting Pages.
7. If the quality is better, but there are still splotches, please repeat the cleaning process to see if it rectifies this.
8. If this does not rectify it, please log a service call using the button below.
Need further help?
E7 Models
In order to give the laser glass a good clean, please follow the instructions below to perform a simple clean on the laser glass:
1. Please locate the panel that you open to install toner cartridges.

2. Open up the panel and on the panel itself, there is a brush that is used for cleaning as shown in the picture attached.

3. After locating the brush, please locate the drum unit that are under the toner cartridges that are covered with the waste toner container as shown in the picture below. Please remove this panel by undoing the clips located on both sides of the panel.

4. The red rectangles are showing where the brush will fit into.

5. Please insert the brush into these slots to clean the laser glass and repeat the process at least 4-5 times.
6. After doing this clean, print a test colour print and compare the print quality.
The best way to do this without needing to send a print to the printer is printing out some Print Quality Troubleshooting Pages.
7. If the quality is better, but there are still splotches, please repeat the cleaning process to see if it rectifies this.
8. If this does not rectify it, please log a service call using the button below.