There are instances that users will need to print on a different paper type for various documents, e.g. brochures, presentations, cards, etc. When this happens you are required to make changes on the printer and your print driver in order to ensure the quality of your prints are the best. Please follow the steps below to have this changed.
Alternatively, click on the button at the bottom of the page to contact RBC Support to have a friendly technician help you have this corrected.
Changing the settings on the Printer
1. Please tap on the control panel of the printer and navigate to the 2nd page where you will locate the "Trays" button as shown below.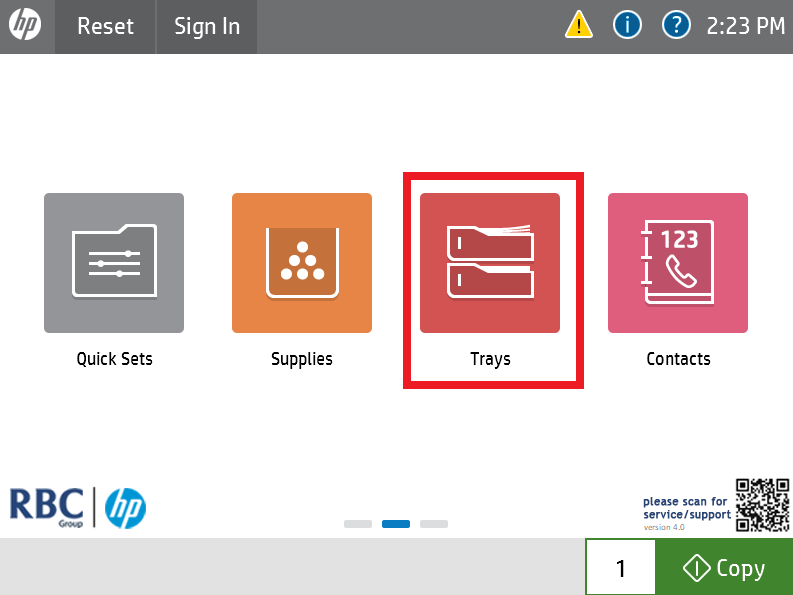
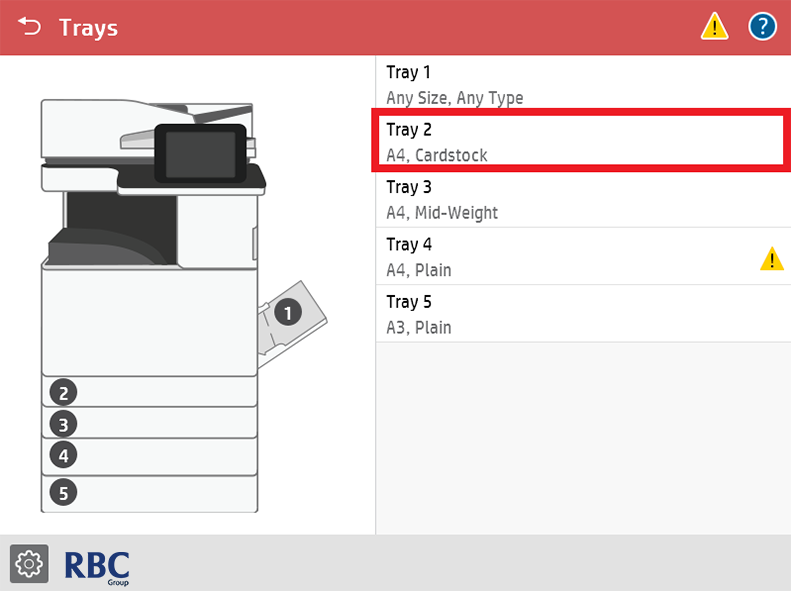
2. Once selected, the page below will show up. Please select the tray that has been allocated with the paper needed to be printed on. The example below is showing that Tray 2 has been selected requiring the change.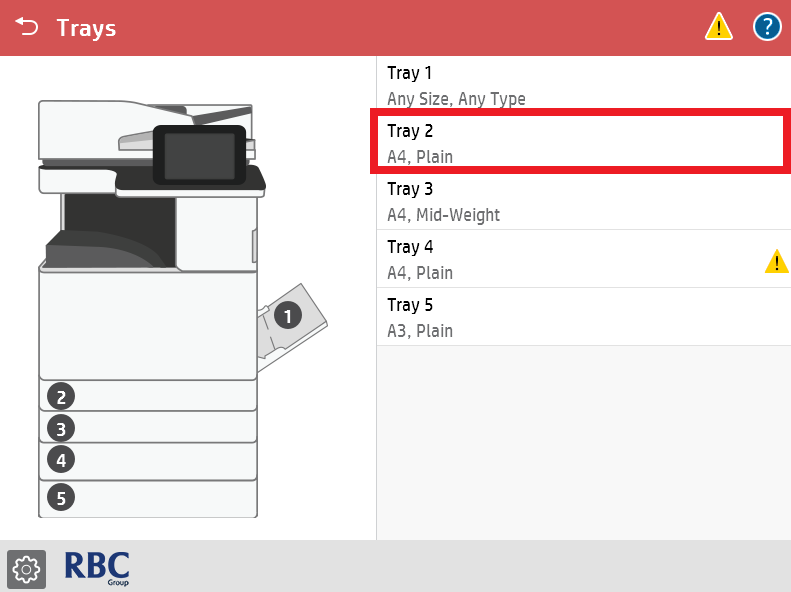
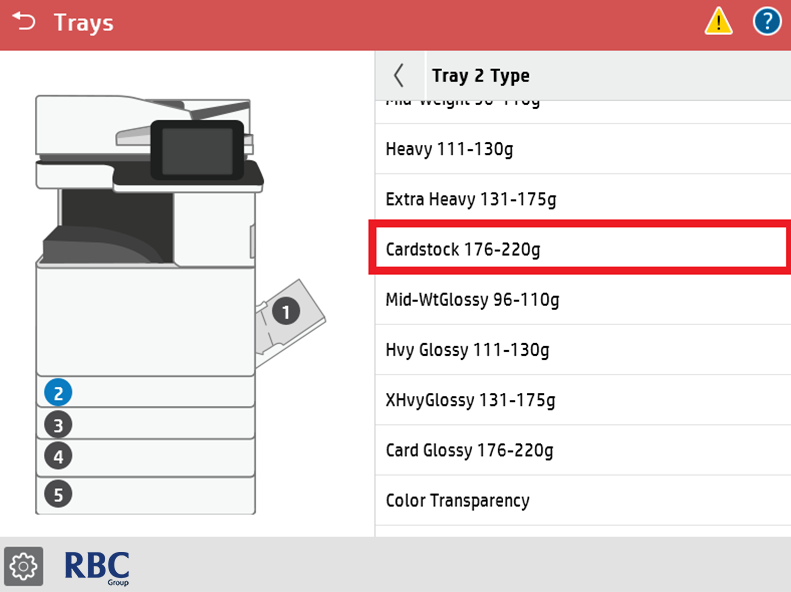
3. The page below will be shown that will allow you to change the size and type of paper in the select tray.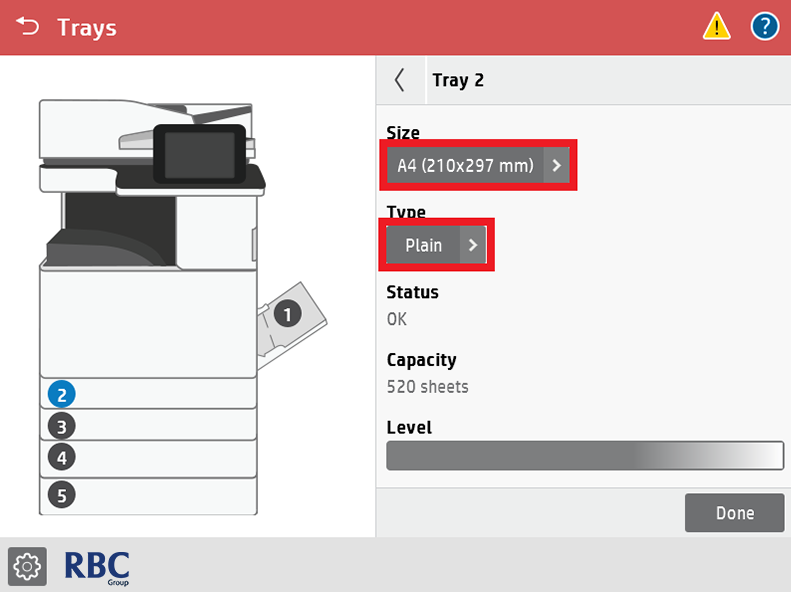
You are required to change the size if it hasn't been set to the size of the paper that has been changed out of the tray. After doing so, please select the Type and choose the paper type/weight of paper that has been allocated into the tray. The example used is A4 size and Cardstock type, weight: 200gsm.
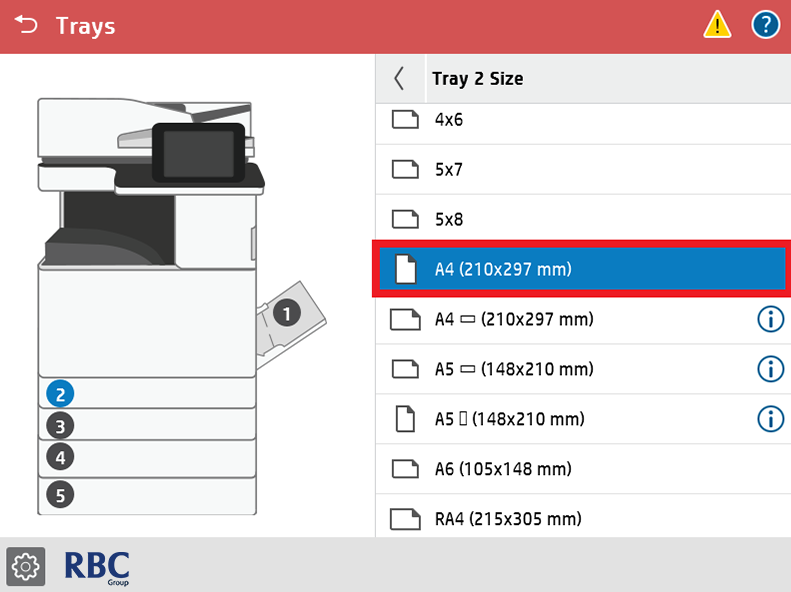
If you are having issues setting the paper guides, please refer to this link that will show you the steps to set the paper guides: Click Here.
4. Once that has been set, you will see the screen below. Please select 'Done' to ensure that the changed settings have been applied. You will then see that the settings have been applied on the initial Trays screen.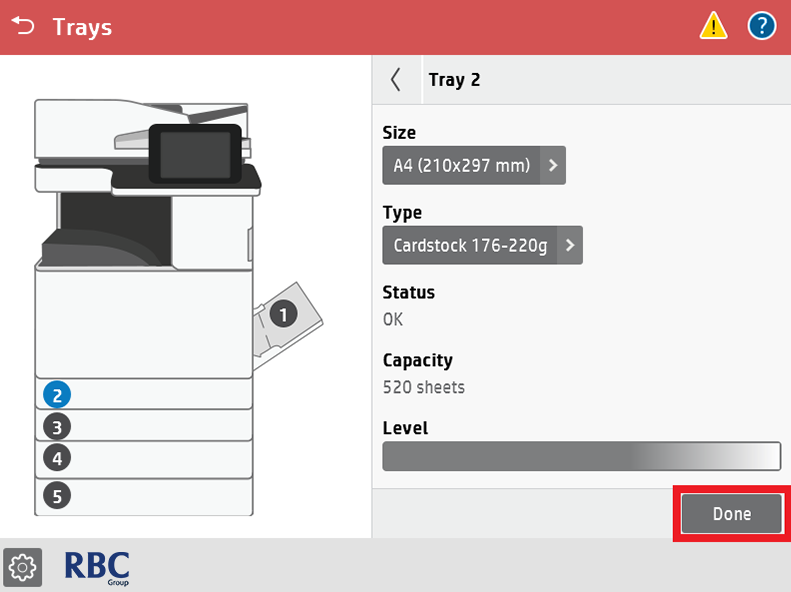
Changing the settings on the Print Driver
1. Please type "Control Panel" in the search bar located in the bottom left corner of your screen and select the first option that appears in the results.
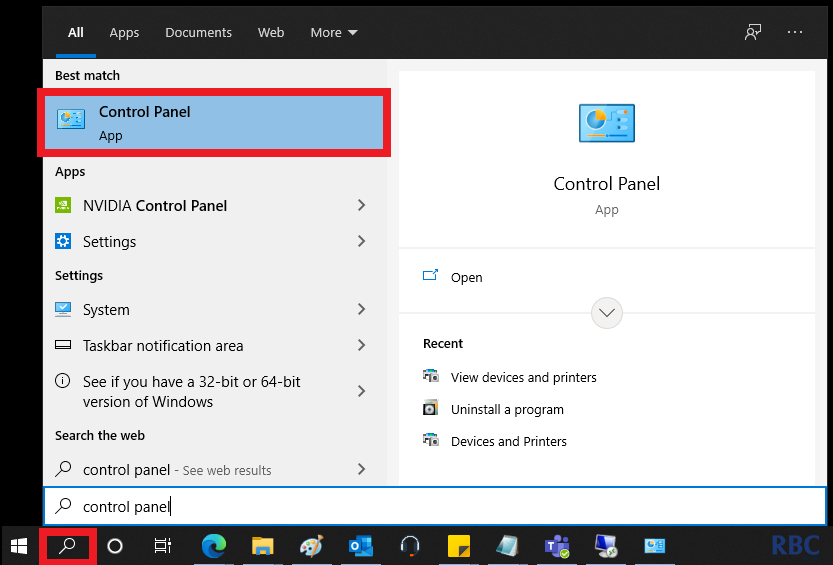
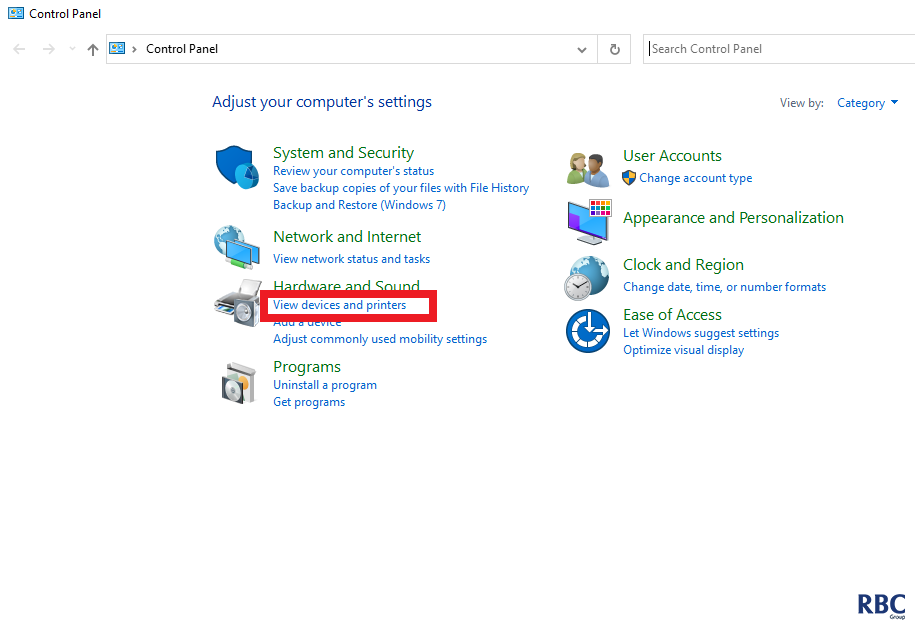
2. Once selected, please select View devices and printers as shown below in the highlighted red area.
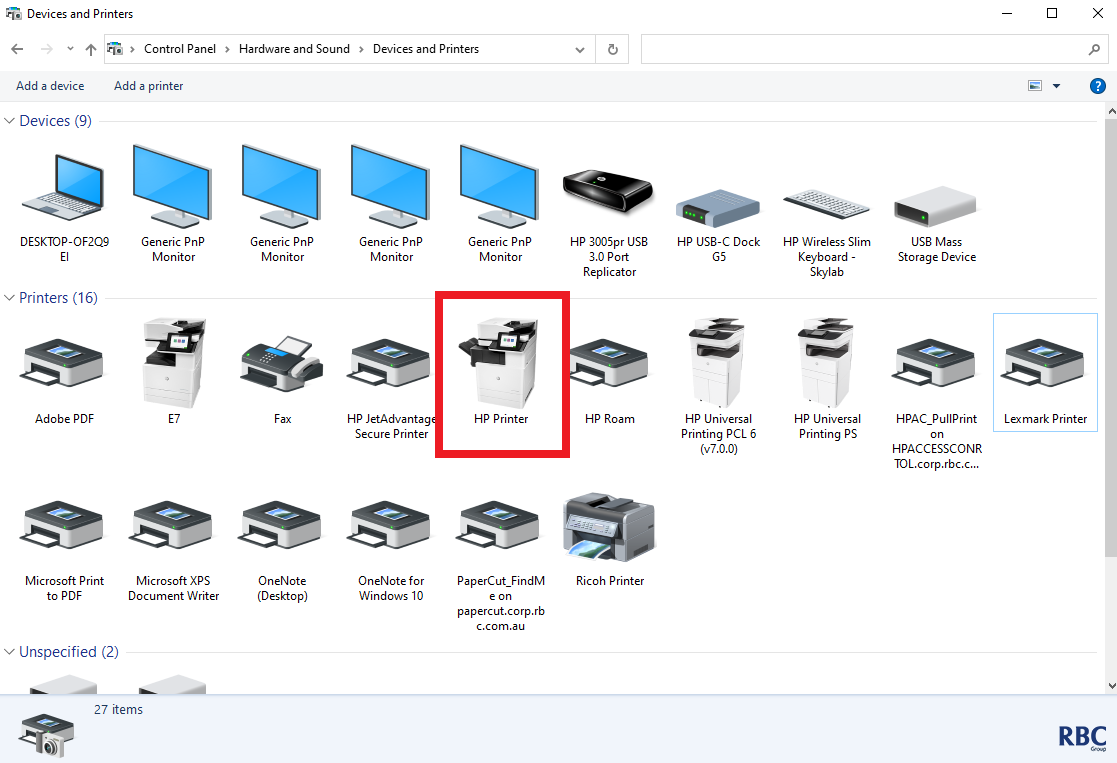
3. Please then proceed to identify the driver you use to print your jobs from when printing.
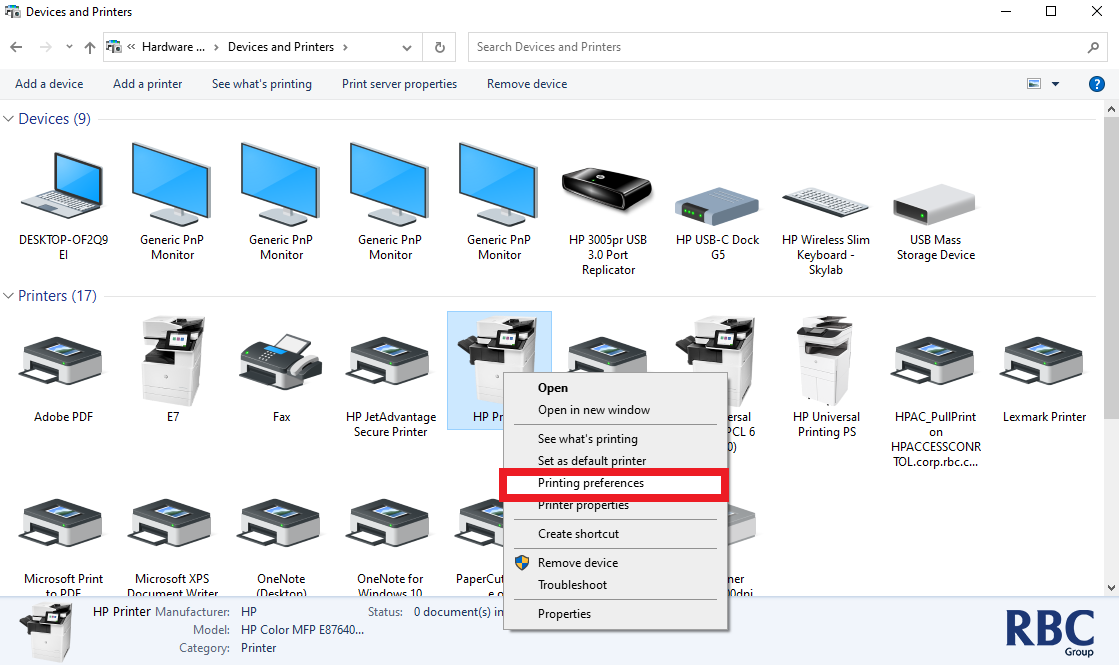
4. Please right click on the selected printer and select "Printer Properties" as highlighted below.
5. Under the tab "Printing Shortcuts," please pay attention to the 3 different options that you will be required to alter to suit the paper preferences you will need. Paper Size, Paper Source and Paper Type.
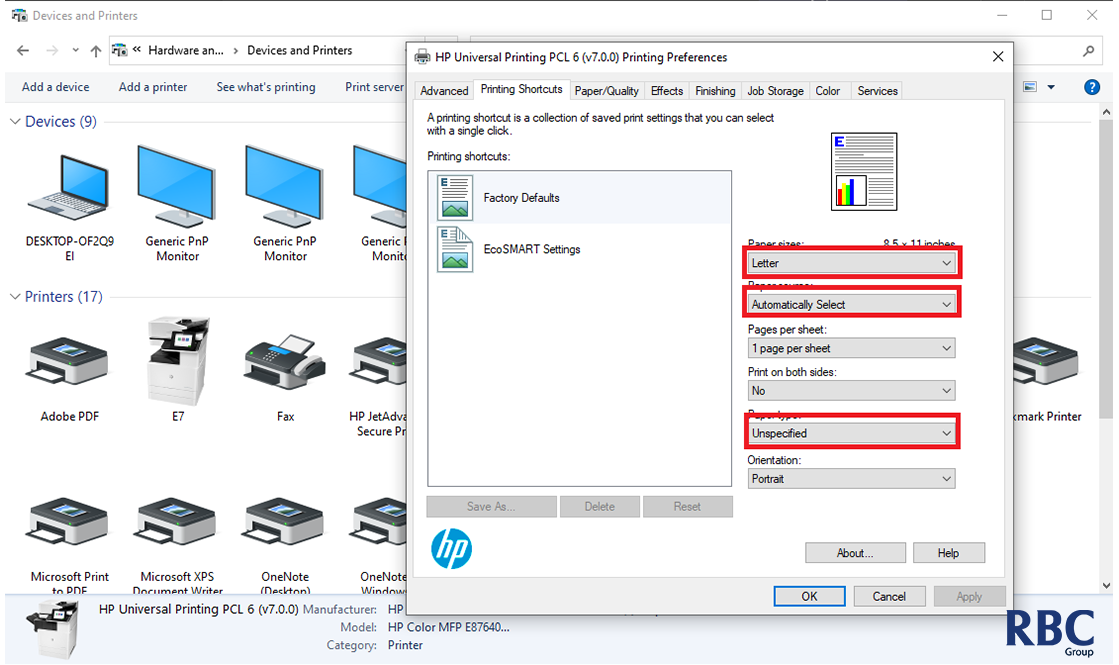
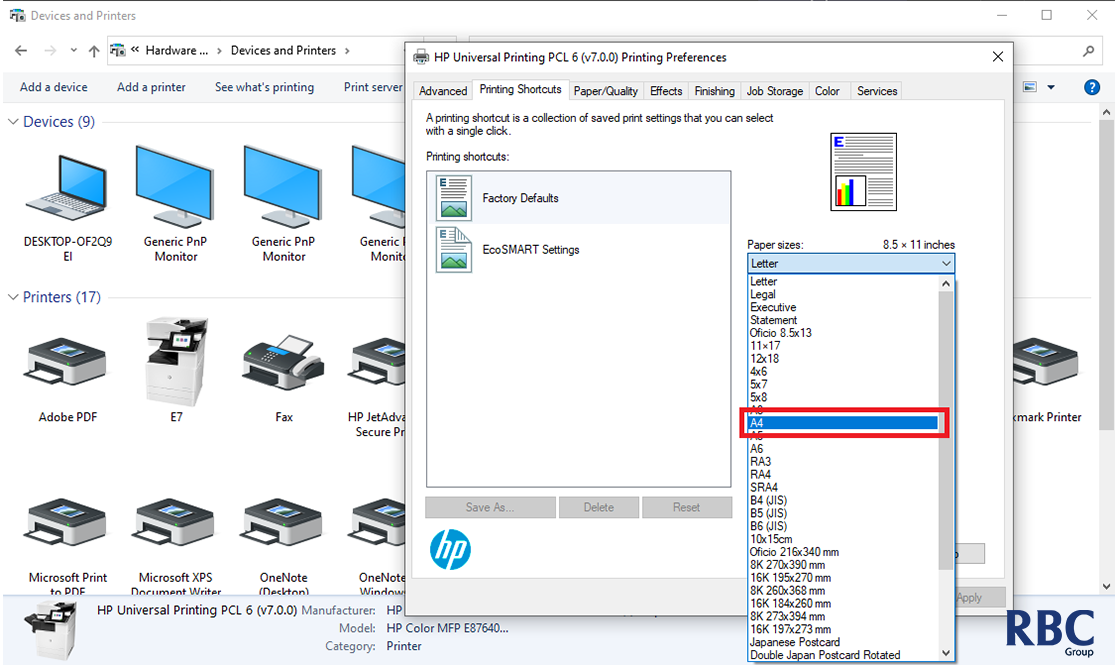
6. Click the drop-down for Paper Sizes and select the size of the paper that you will be printing on. Please ensure that the paper guides have been been set correctly in the paper trays to ensure that the printer is selecting the right sizes. In this sample, A4 is selected for the size of the paper.
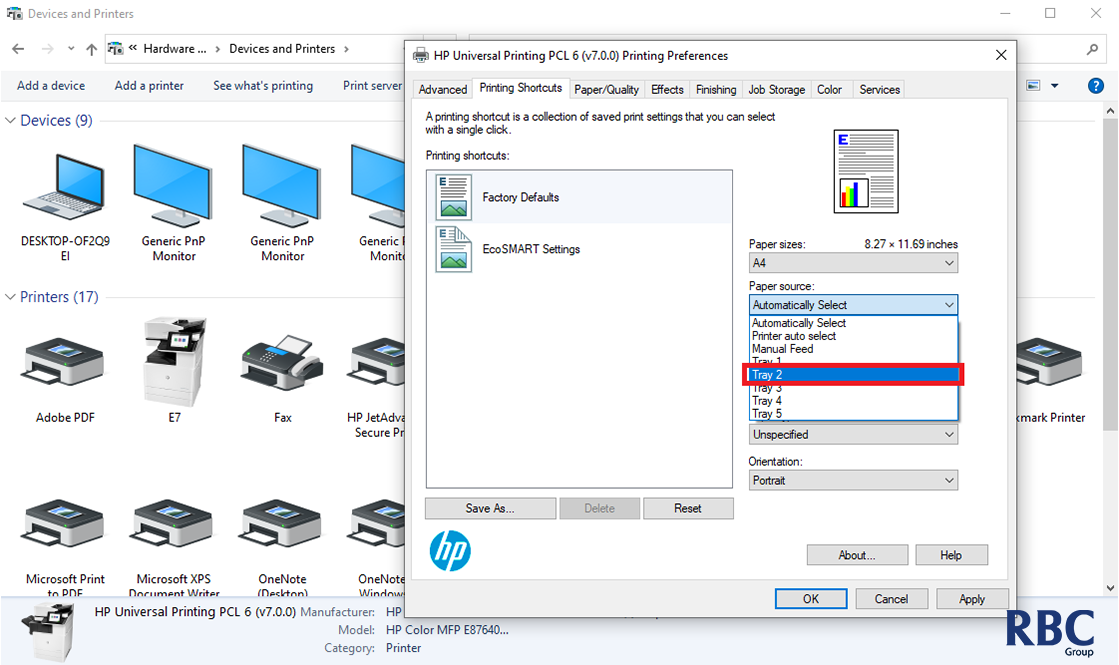
7. The next selection is as shown below, the paper source. This should be set to the tray that the paper has been put in. Printers will normally detect the paper in the trays to pick up the right one, but this is to make sure that the printer will select the correct tray to print from. As shown, tray 2 is selected.
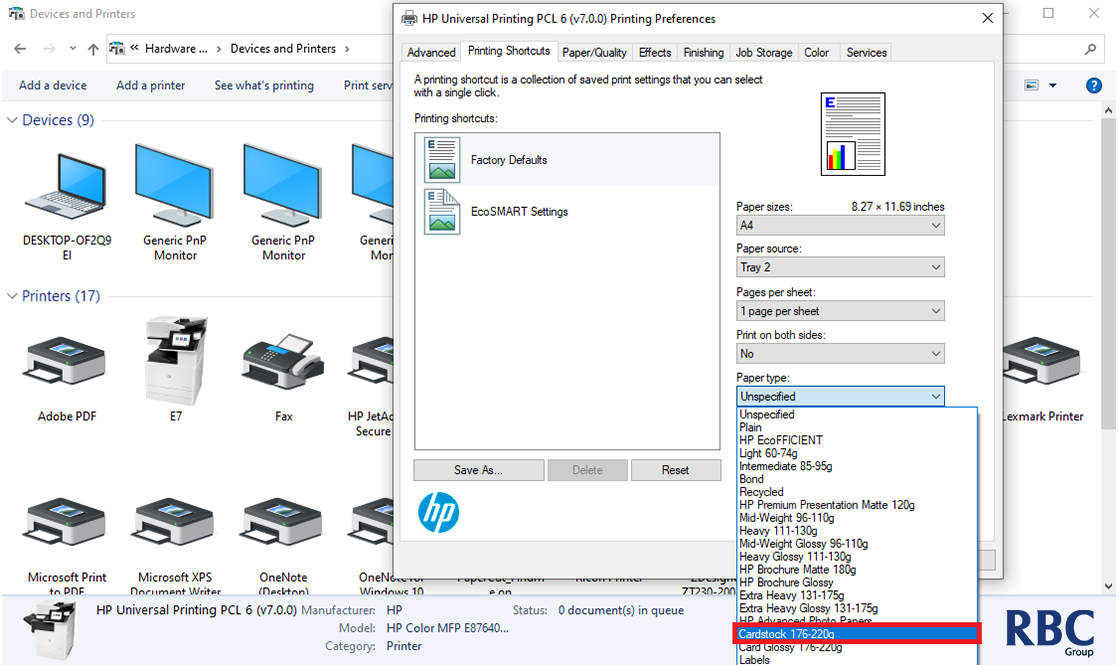
8. Lastly, the paper type is to be selected. In this example, cardstock is selected to match the settings that have been set up for tray 2. This has to be done as this will allow the printer to print at a speed that matches the paper type.
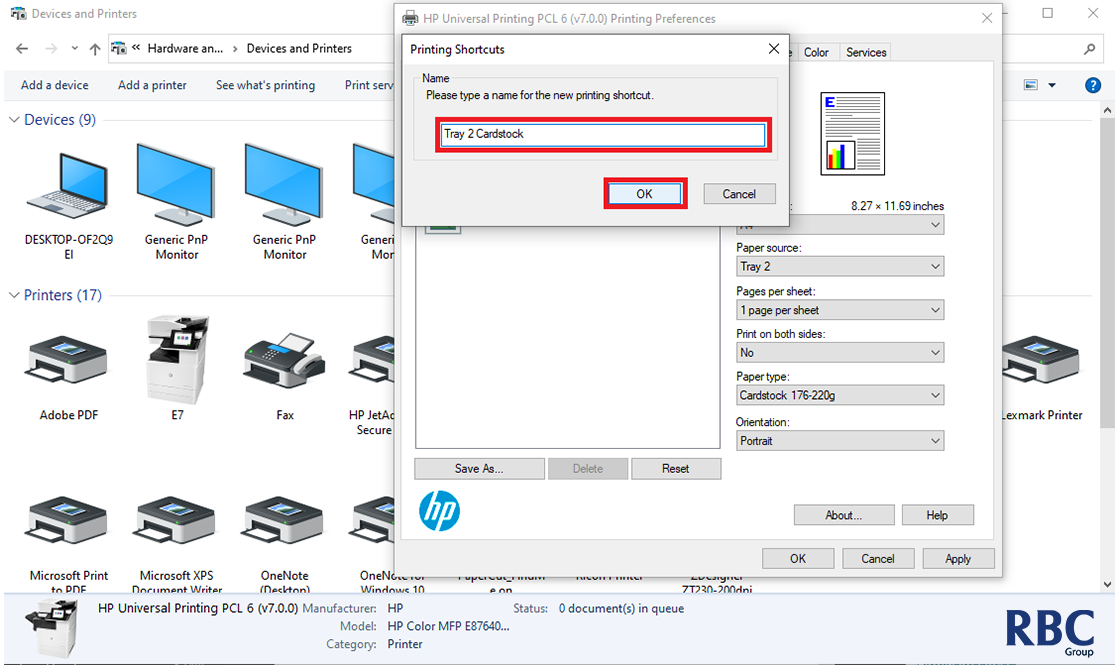
9. Once done, please select "Save As" if you will be using the tray settings for future prints as well in the specified paper tray.
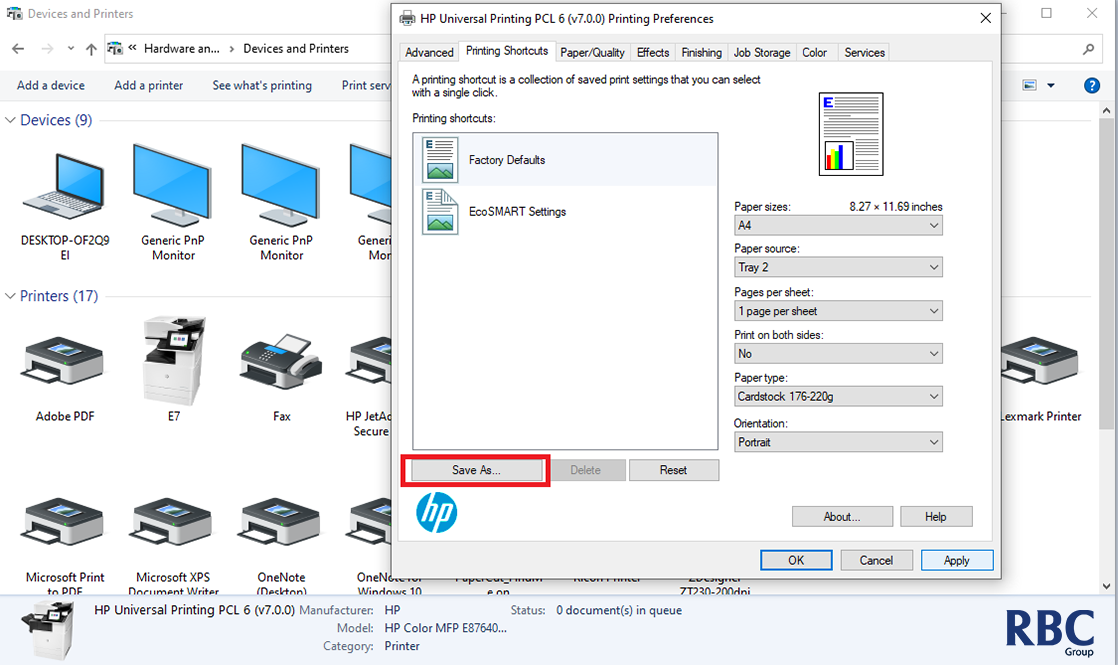
10. Please name the shortcut a name that is easily recognised by the user of the shortcut for your future prints, select "OK" once done.
11. Lastly, please confirm that the shortcut has been set up correctly by selecting it and double checking the settings if these have been applied. Please click "Apply" and then "OK" to save your settings.
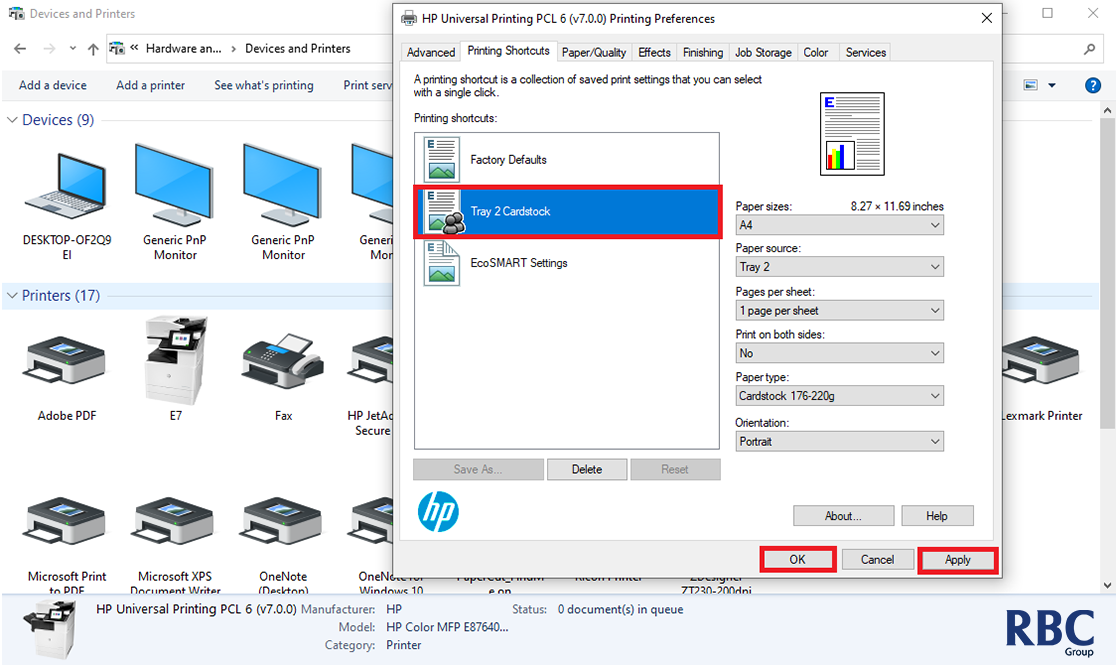
Please be reminded that you will need to select these settings by going into the advanced printing options of the program you're using, highlight the shortcut and click "OK" to apply the settings to your next print. These settings might be retained so please double check if you are needing to change your print settings back to default.